Send Messages To Discord Using AWS Lambda Functions
Learn how to send a message from AWS Lambda to a Discord channel using Discord’s built-in Webhooks function. This tutorial will show you how to configure the AWS Lambda and a Discord webhook endpoint to send messages to a specific Discord channel.
What is AWS Lambda?
- Lambda is a compute service that lets you run code without provisioning or managing servers.
- Lambda runs your function only when needed and scales automatically, from a few requests per day to thousands per second.
- You can run code for virtually any type of application or backend service.
- Learn more about AWS Lambda here
What is a Discord Webhook?
- Discord’s built-in Webhooks function as an easy way to get automated messages and data updates sent to a text channel in your server. Learn more about webhook here
- Tip: Discord messages have “Rate Limits, meaning you can only send a specific number of messages, or requests to be exact, per second. You can learn about it here
Getting Started
This tutorial assumes you are familiar and comfortable utilizing the terminal, navigating the file system without a GUI, and navigating the AWS Console. To take full advantage of this tutorial, review the list of prerequisites below.
Prerequisites:
- Access to AWS account
- AWS Lambda functions
- Access to Discord account
- Python installed on your system
- Intermediate to advanced Python programming
Create a Discord Server
We will first create a Discord server and use the default Discord channel to prepare incoming messages.
If you already have a discord server created and a channel ready, you can skip this step and jump to the “Create a Discord Webhook” section.
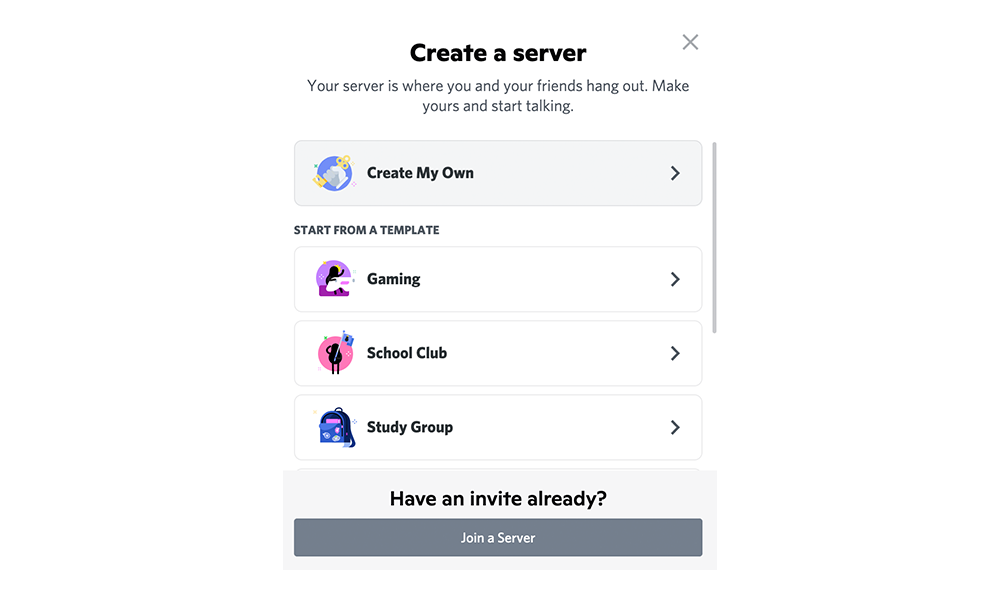
Navigate to the Discord website or open the Discord desktop app to access your account. Next, create a discord server by clicking on the green button with the big plus symbol.

On the Create a server window, click the Create My Own button.
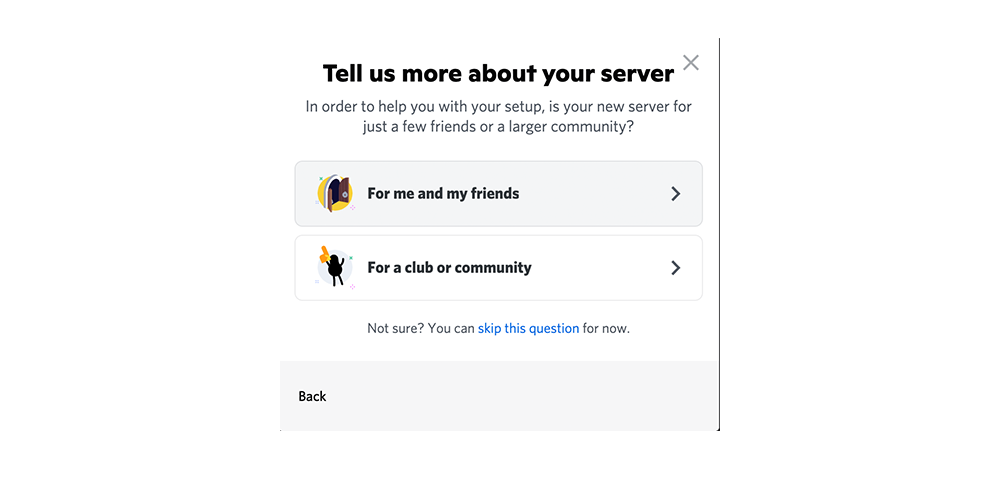
On the following Tell us more about your server window, click on the For me and my friends button.
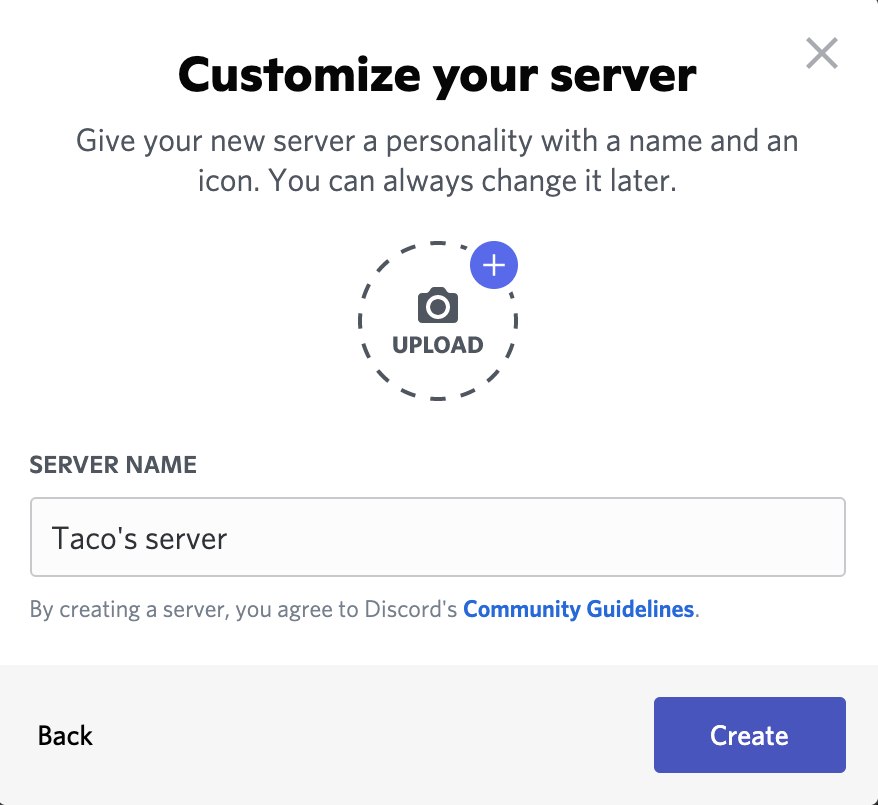
Finally, on the Customize your server window, you can change the server’s name in the Server Name field or click on the Create button to complete the server setup.
Create a Discord Webhook
In this example, I will use the default channel to create my webhook url, but you can create another channel if you desire.
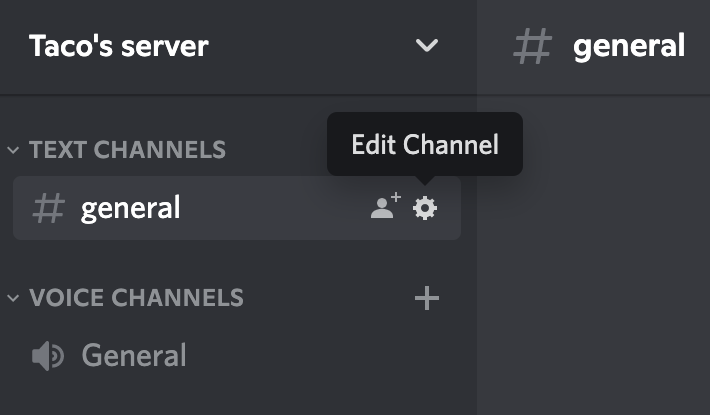
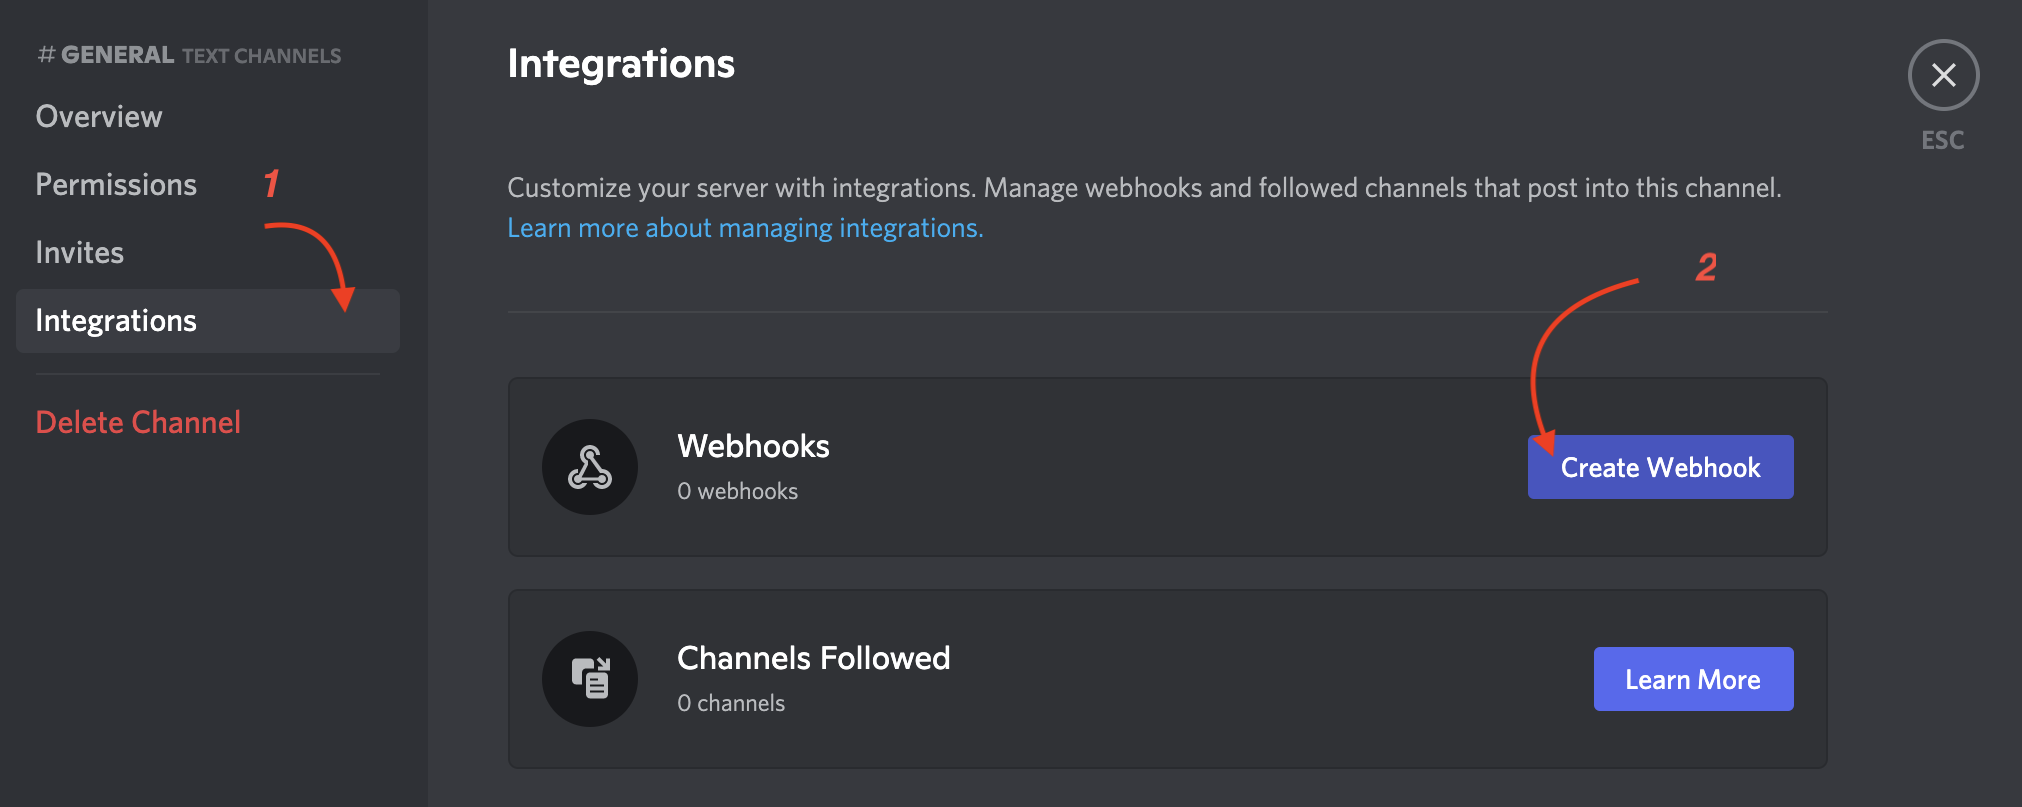
Locate the Edit Channel button, which looks like a “Gear” icon on the left-hand side of the Text Channels pane. Click on the “Gear” icon to display the settings window.
Next, click on the Integrations button to display Integrations settings. Then click on the Webhooks button to open a new webhooks window.
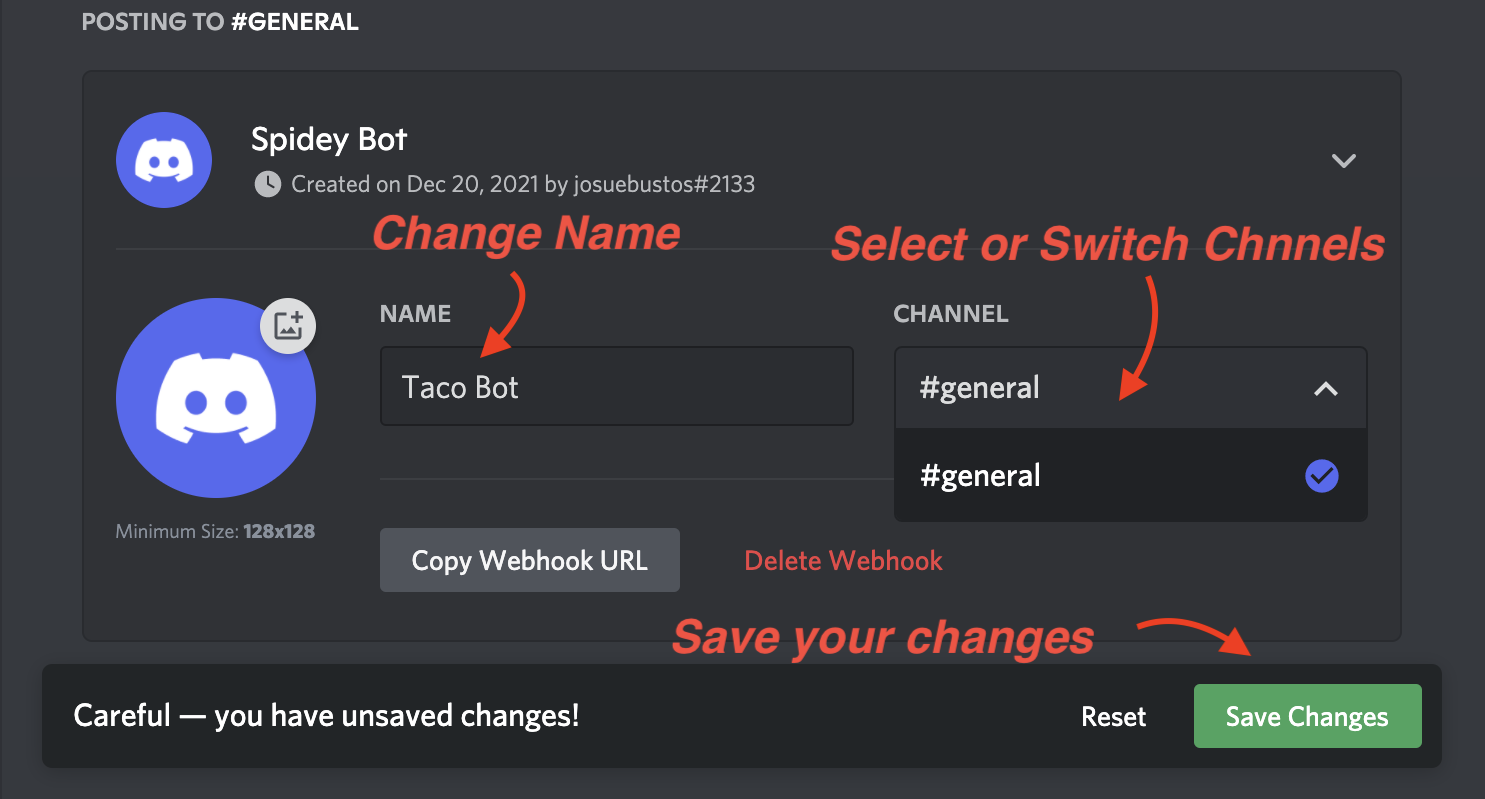
You can leave everything as is or if you have more than one channel, use the drop-down menu to select another channel. You can also take this time to change the title of the channel.
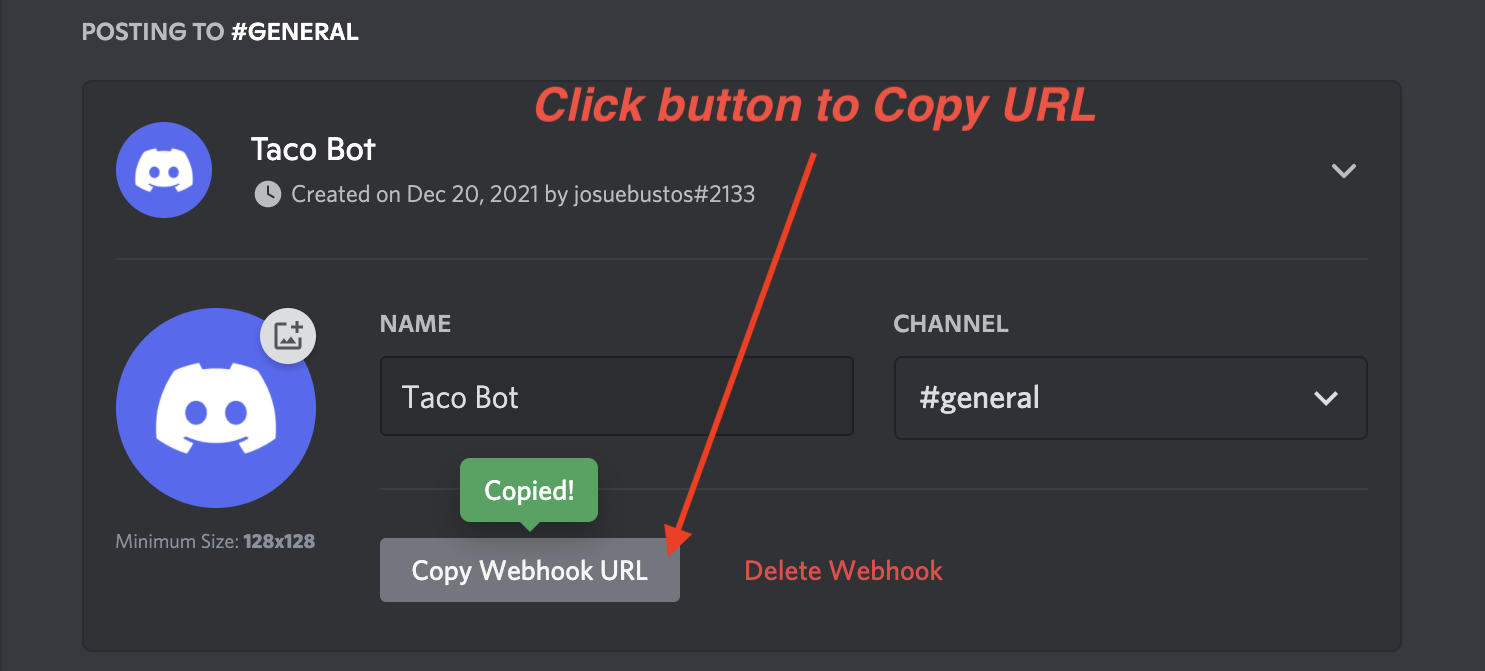
And finally, click on the Copy Webhook URL button, which copies the string to your clipboard. Next, close the window by clicking on the “X” button in the top right corner.
And that’s it! Move on to the next section to configure your AWS Lambda.
Prepare AWS Lambda Layer
To utilize Python packages in an AWS Lambda project, you must first upload a zip file containing all your Python packages to an AWS Lambda Layer. I will show you how to set that up in the following few sections.
Let’s begin.
Create local directory
We’re only installing one package called discord-webhookto keep our project simple. For more code examples and usage visit the link here
Next, create a directory/folder and give it a unique name or open a terminal and type the command below like so:
$ mkdir my-projectDownload Python packages
For this next step, you will need to access the Terminal window. If it’s not already open, open the Terminal window and type the following command to change the directory and install the discord-webhook package in the current directory.
$ cd ~/Desktop/my-project && pip3 install -t . discord-webhookThe -t flag forces Python to install all your packages in the current folder by “targeting” the current working directory/folder. In our case, it’s the current directory indicated by the period symbol “.” located after the “-t” and “discord-webhook” is our Python package.
Next, remove unnecessary files by typing the command below like so:
$ rm -r *dist-info __pycache__Suppose you see a warning like the one below. It just means that a specific folder doesn’t exist. Some systems include this folder when downloading python packages.
rm: __pycache__: No such file or directoryAt the time of this writing, the current version of discord-webhook is 0.14.0.
Compress and Zip directory
You can zip the folder manually or use this handy terminal command by typing the following like so:
$ zip -r -q ~/Desktop/my-project.zip .Configure AWS Lambda Layer in the cloud
Before launching and executing our main program from the AWS Lambda console, we need to set up our AWS Lambda Layer containing the Python packages you download earlier.
Create AWS Lambda Layer
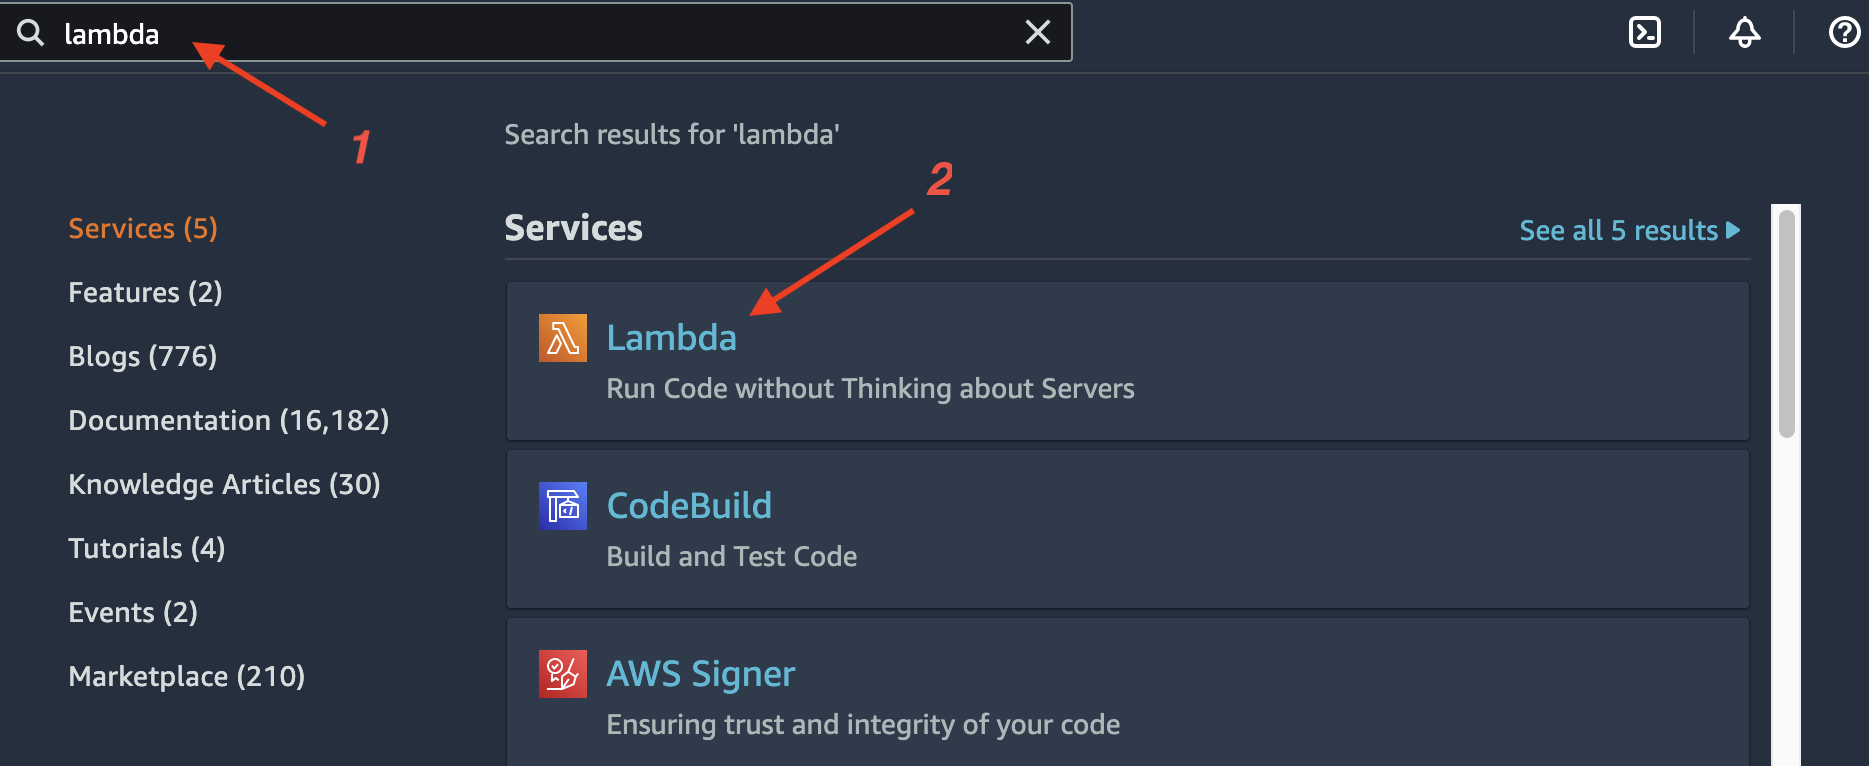
Open a web browser and sign in to your Amazon Web Services console. Next, locate the search bar, type “lambda,” then click on the Lambda link to navigate the AWS Lambda Function web page. See the image below for guidance.
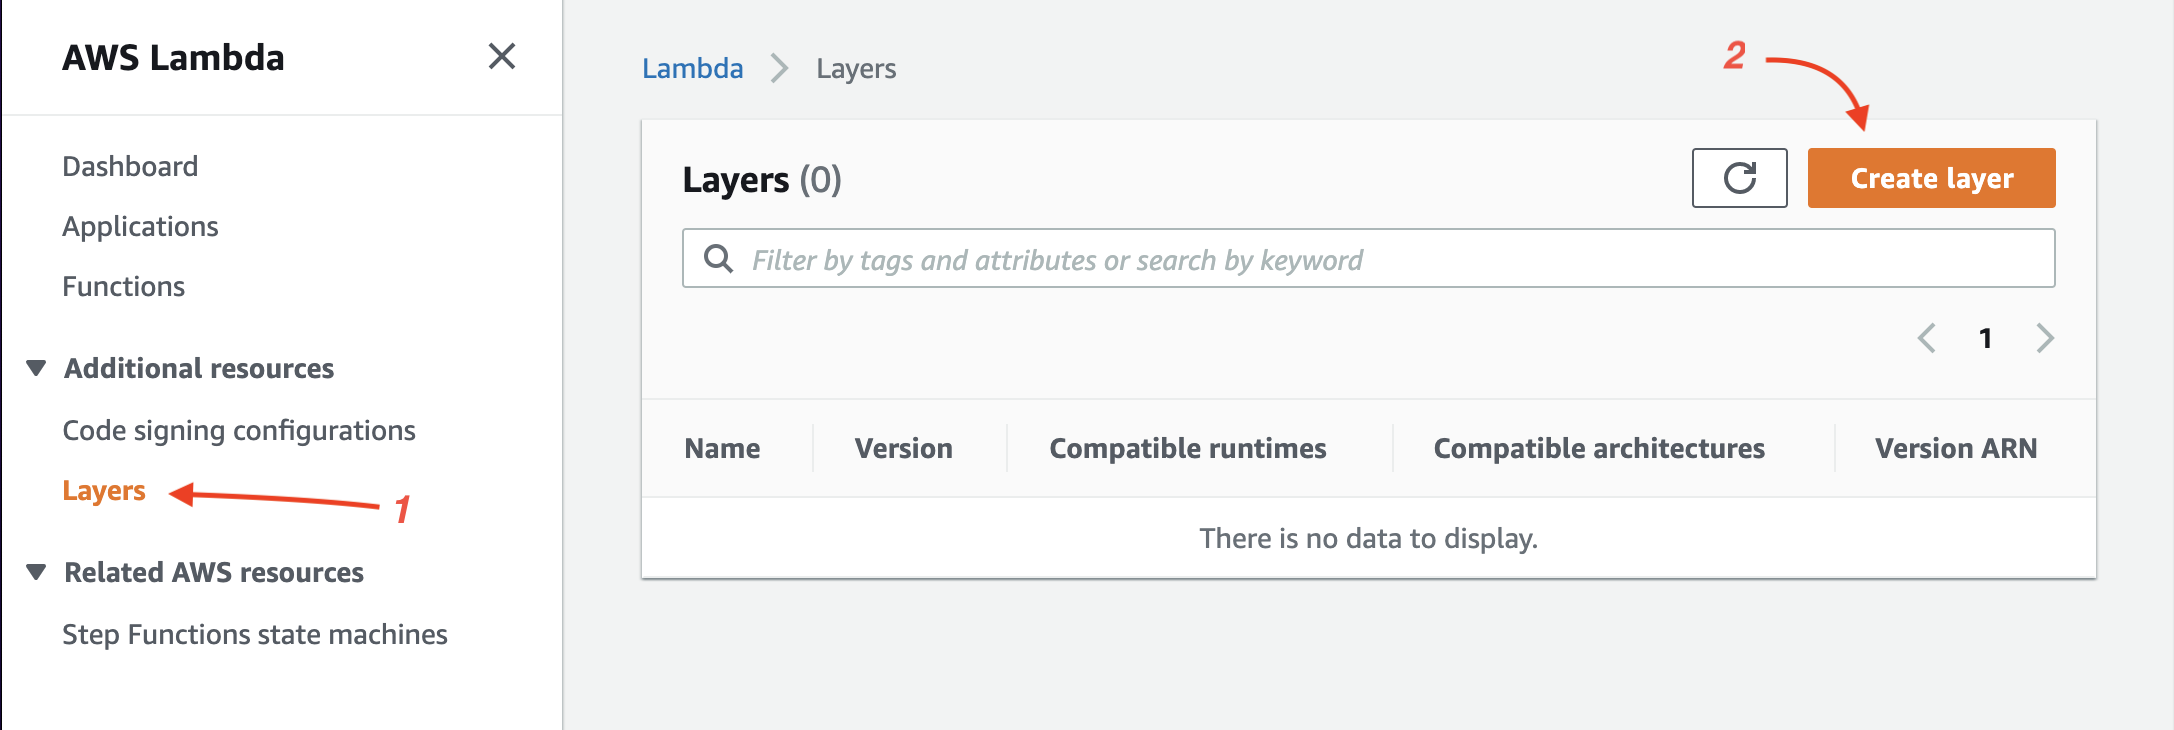
On the sidebar on the left-hand side, locate and click on the Layers link to jump to the Layers page. Next, find and click on the Create layer button to initiate the “AWS Lambda Layer” creation process. See the image below for guidance.
Upload Zip File
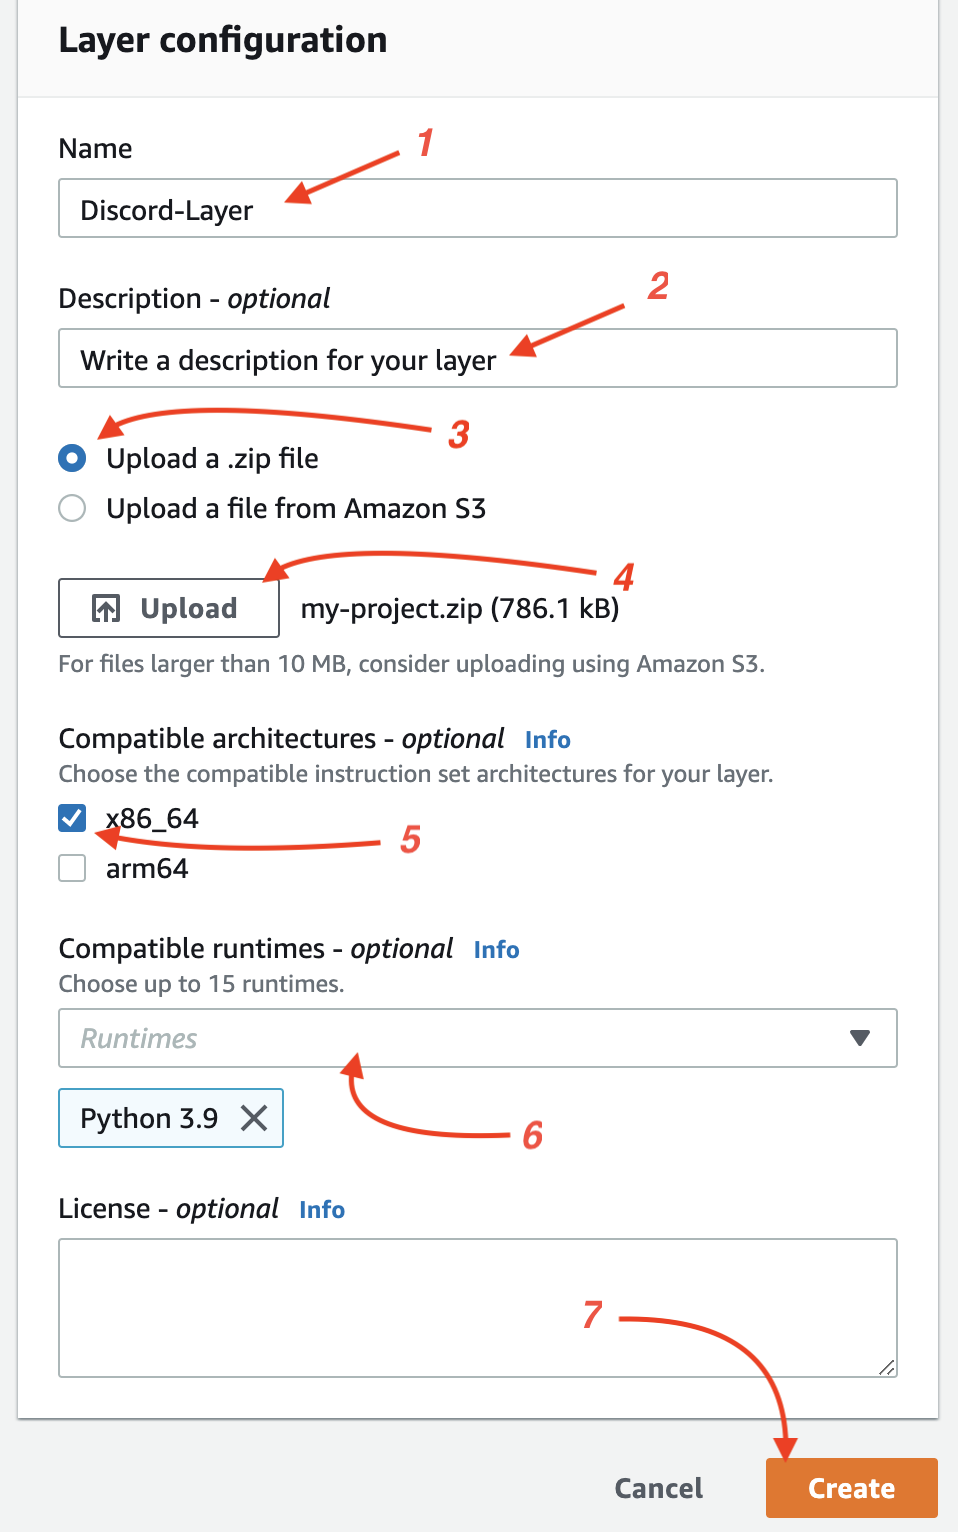
Use the list and image below to help fill out the form.
1) Name: Discord-Layer
2) Description: Write description for your layer
3) Select: Upload a .zip file
4) Upload file: my-project.zip
5) Select architecture: x86_64
6) Select runtimes: Python 3.9
7) Click Create button
Excellent! Now you’re ready to create your AWS Lambda Function!
Create AWS Lambda Function
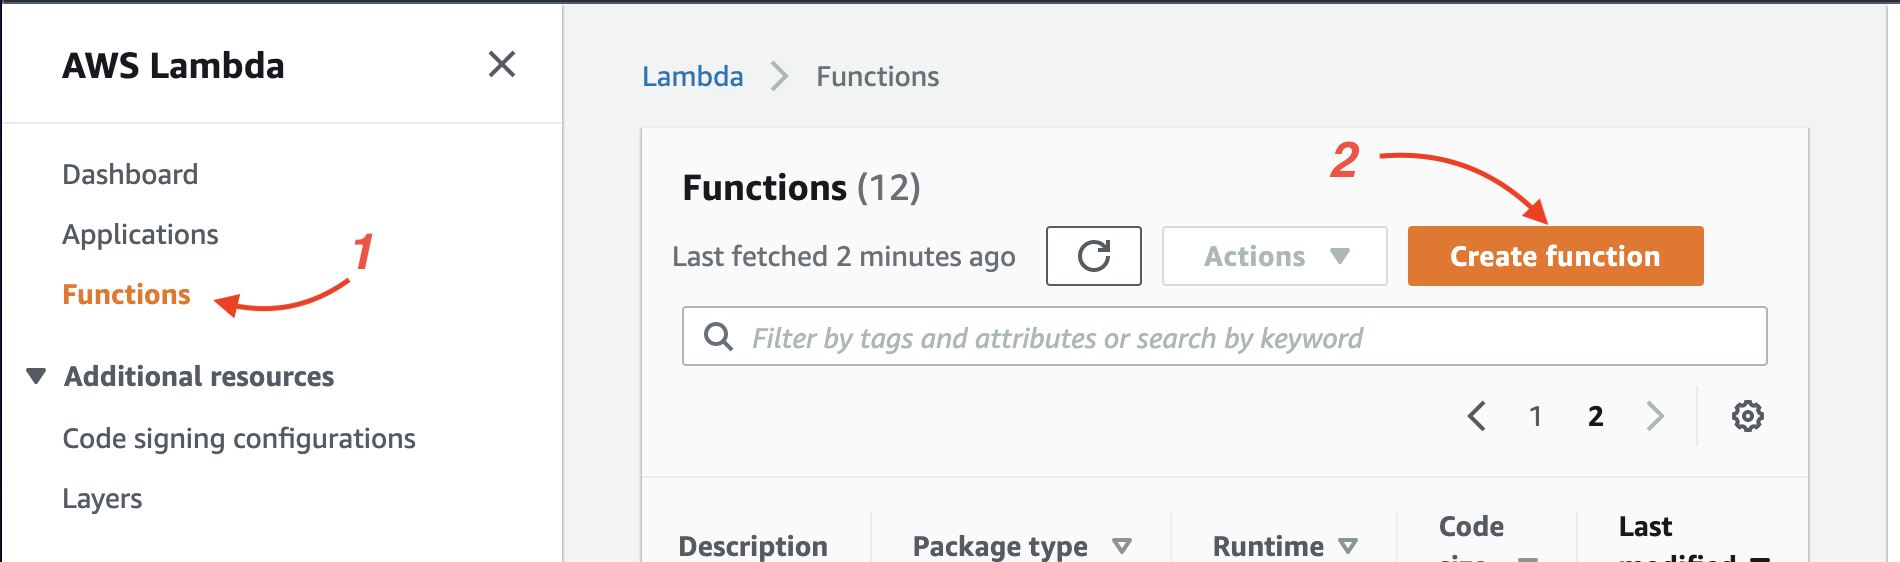
On the left-hand sidebar, locate and click on the Functions link, then on your right-hand side, locate and click on the Create function button; this will open a new window.
By default, the Author from scratch is selected. Leave it as is and scroll down to fill out the form. You can also use the image below to guide you.
1) Function Name: Discord-Webhook
2) Runtime: Python 3.9
3) Architechture: x86_64
4) Click Create function

You can leave the rest of the settings and wait a moment for the AWS Function configuration process to finish.
Import Python modules
When you arrive at your AWS Function page, scroll to the bottom of the page, locate and click the Edit button.
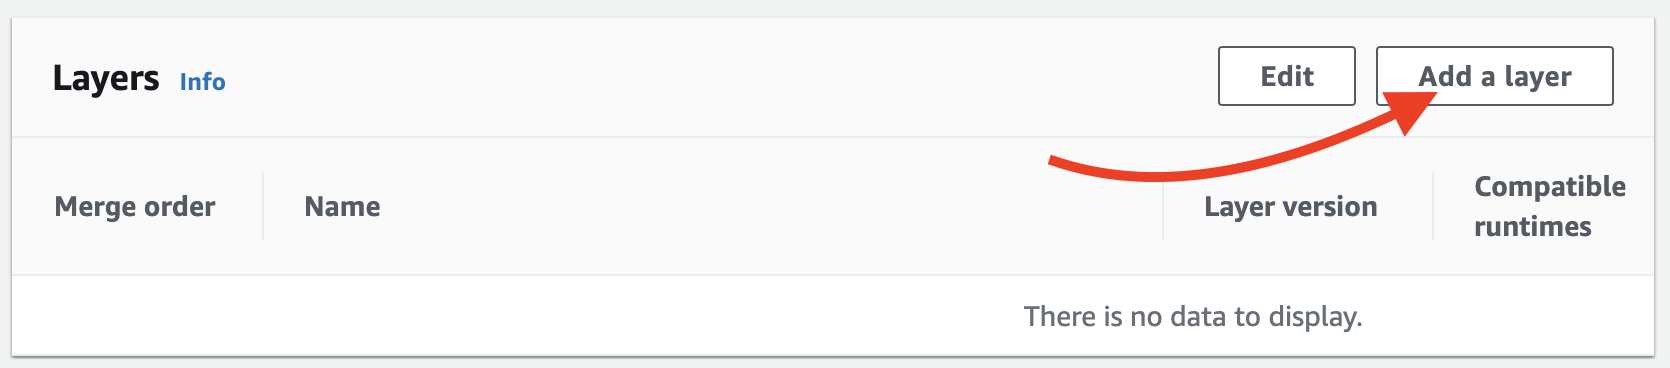
1) Layer Source: Custom layers
2) Custom layers: Discord-Layer
3) Version: 1
4) Click Add

Configure Test Event
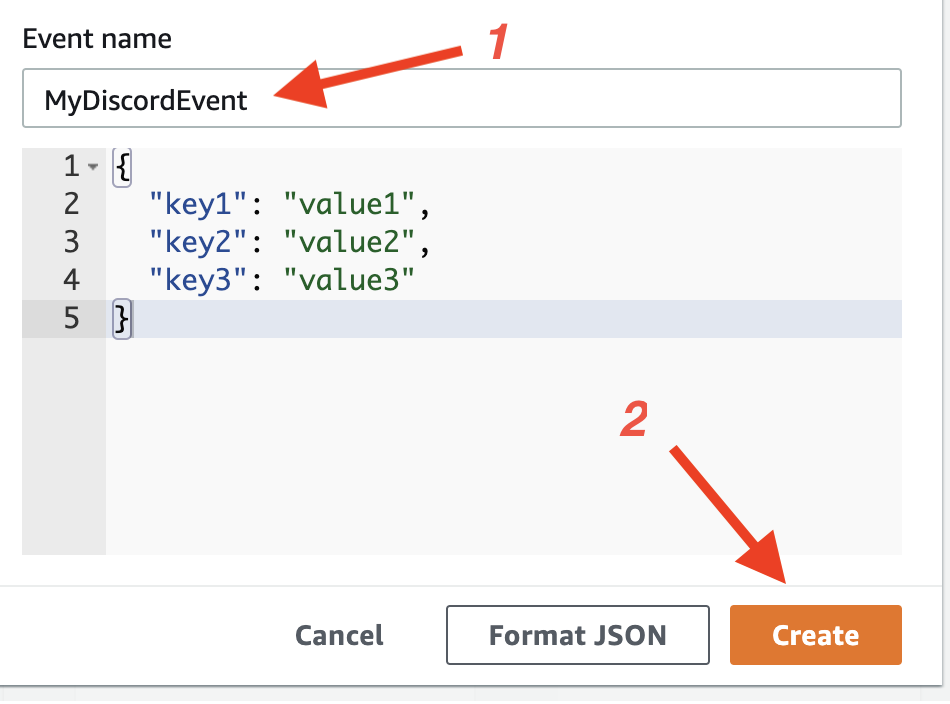
Before we can execute our AWS Lambda Function, you need to configure a Test event.

1) Saved Test Events: MyDiscordEvent
2) Click Create button
Import Python Modules
Now for the fun stuff!
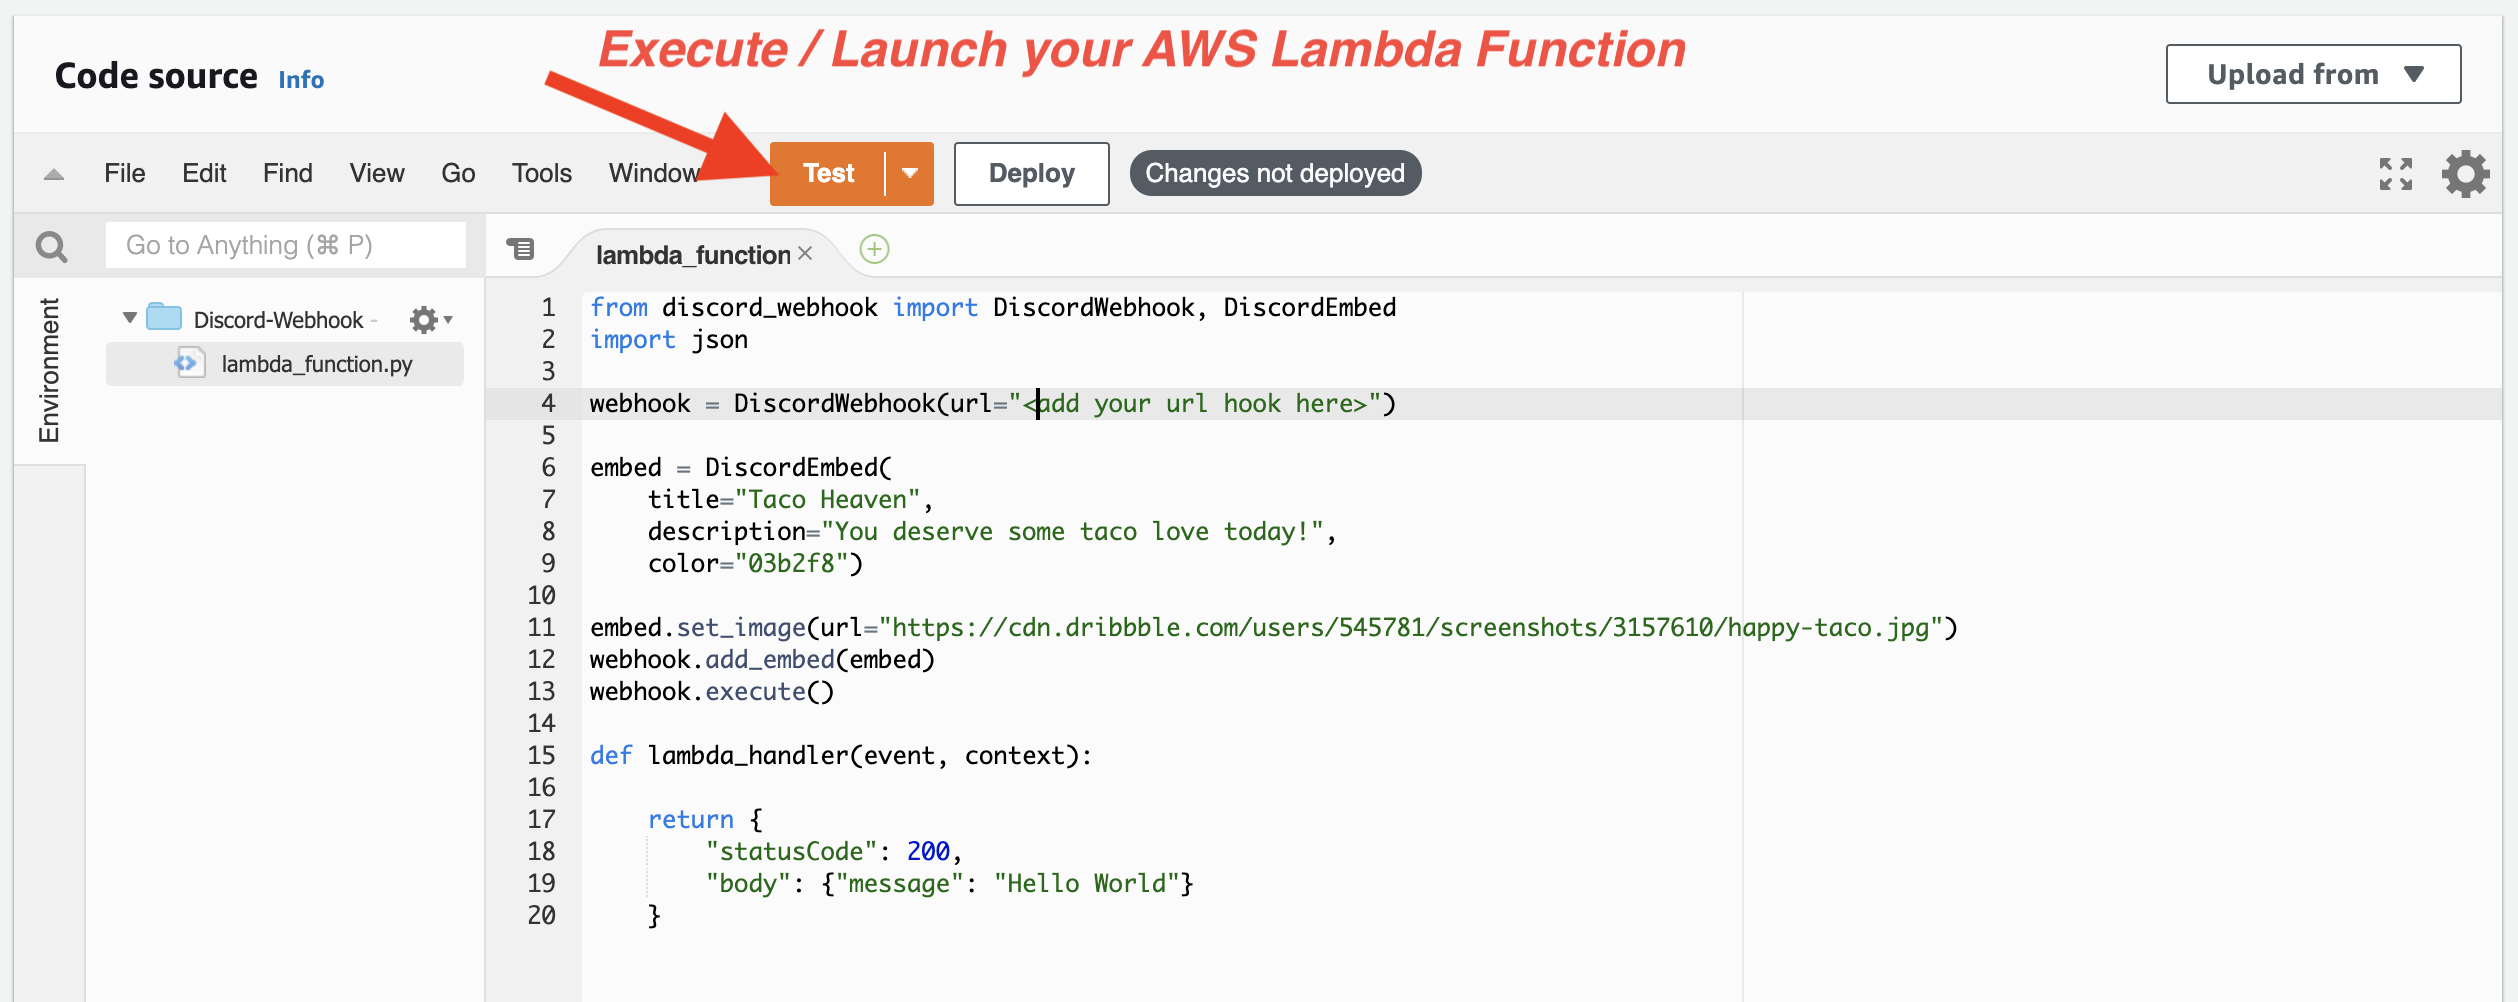
Go ahead and copy-paste the code below into the cloud nine text editor. Make sure to replace this with your Discord channel url webhook.
webhook = DiscordWebhook(url="<replace_with_your_hook>") embed = DiscordEmbed( title="Taco Love", description="You deserve some taco love today!", color="03b2f8") embed.set_image(url="https://cdn.dribbble.com/users/545781/screenshots/3157610/happy-taco.jpg") webhook.add_embed(embed) webhook.execute() def lambda_handler(event, context): return { "statusCode": 200, "body": {"message": "Hello World"} }Send Discord Message
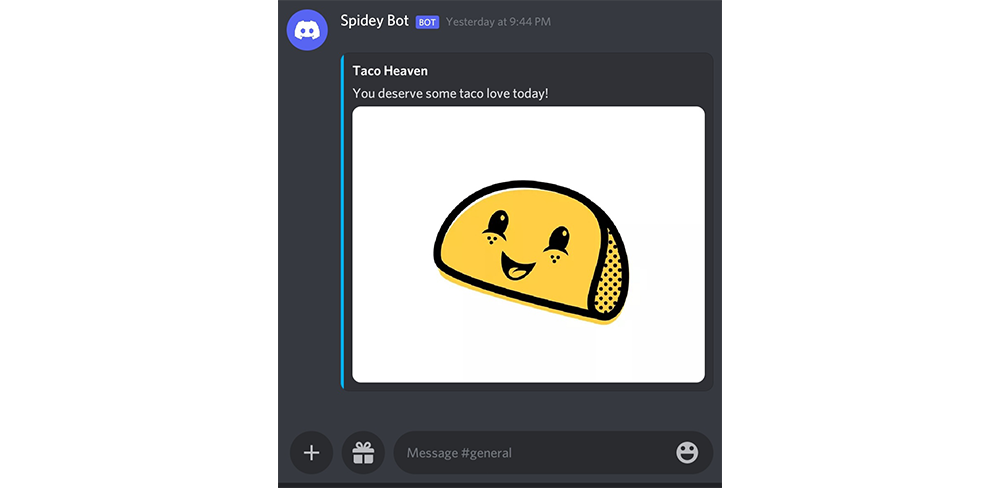
Now, for the moment of truth!
Open your discord channel and click on the orange Test button.
If everything was done correctly, you should see a nice happy taco!
conclusion
Recap:
- You created and configured a AWS Lambda Function
- You created and configured a Discord Webhook
- Implemented a Discord API using Python programming language
—
If you’ve gotten this far YOU. ARE. AWESOME!
At times, working with AWS Console can be a bit discouraging and a bit scary. I hope this tutorial gives you a bit more confidence and more courage to continue pursuing code and any of your cloud certifications!
Until next time,
Stay AWSome!